Road To Avalon: My very first conversion!
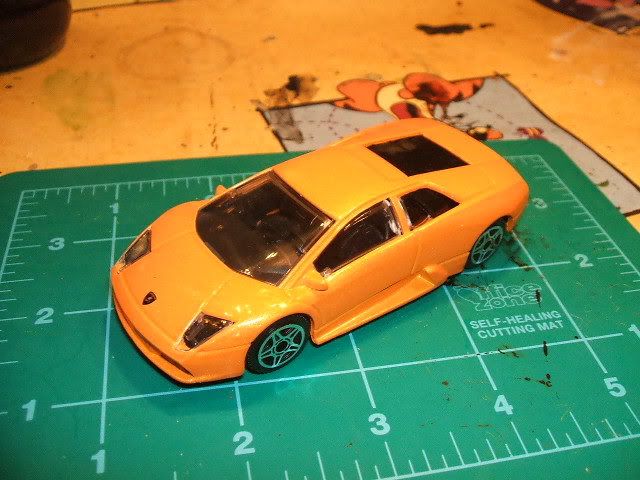
Going from this:
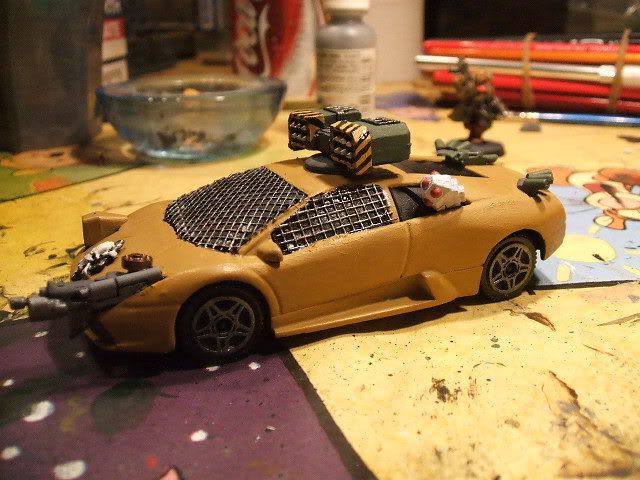
To this:
In less than 4 hours!
As I promised a few days ago, I was about to embark on creating my very own and very first conversion of a 1:43 car into something roadworthy. And lo' and behold; here is the said article!
Putting it all together -
First up, I purchased a set of three cars to convert into Road Warrior cars. Of these, I chose the Lamborgini-wanna-be to be my first test subject because I had have had almost no experience in converting vehicles before this time around; and this car looked like it would have the best potential for ease of conversion.
So after having looked through my rather large Junkpile or "bitz box" if you prefer; I chose some key components as outlined in this picture.
The parts you can see are: An old Deathwing Terminator Cyclone Missile Launcher Pack, an old VASA Suppressor Shield (for the Missile Launcher Turret base), a cable from an Imperial Guard Heavy Weapons Lascannon, a laspistol cut in half, a targeter from the same Heavy Weapons pack, a VOID Interdict Marine Gauss Carbine, some Plastic Wire Mesh, a Tau Targeter from their Battlesuit set and most imporantly a Rail Cannon from the same pack.
Of course, during the construction of the wolf I found a few other bits to add to the car which aren't included in this photo. Primarily I added a Tau Targeter, some puches and some old smoke launchers from an old-school rhino kit.
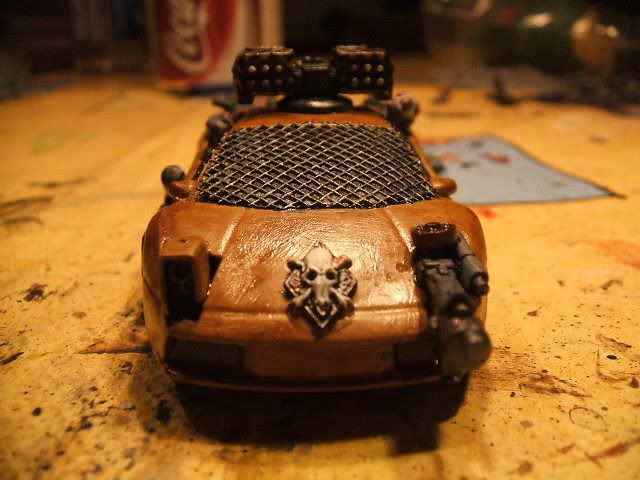
So I went to town and added all of these bits and pieces to the car itself. I chose to mount a Wolf glyph, stolen from an old Space Wolves Space Marine Squad on the hood of the car; so as to signify who the local gangers were dealing with here. In addition I added a targeter on the right of the car for the Side Mounted Railgun, and to the left I stuck the forementioned Gauss Carbine in the other frontlight socket. A few other pieces were added to bulk it up - these will have no ingame effect. And finally, the wire mesh was added to the window.
The Wolf, Front, Unpainted.
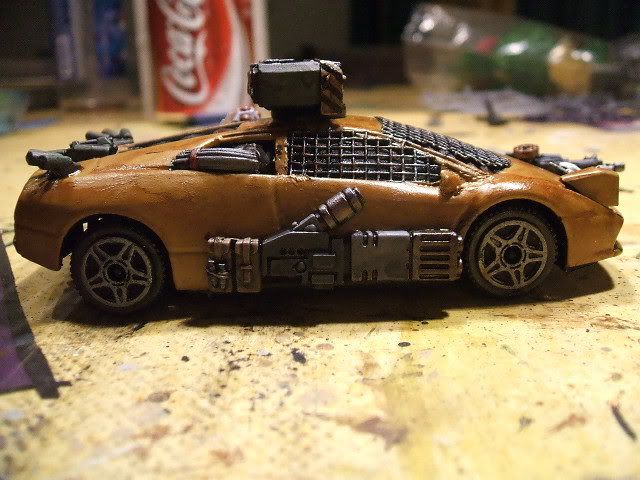
On the right side I added the heavy Rail Gun, aligning it with the rail on the side of the car, and added some pouches to the rear of this gun to bulk it up a little. Then I added the forementioned cable; to signify that the actual worknings of the Rail Gun is on the inside of the car. Finally, I added the shiled as the turret base of the Missile Launcher, and tilted it slightly to the left of the car.
The Wolf, Right, Unpainted.
On the left side, very little was added, save for the Tau targeter. In this case, I went for "Less Is More"; and considering that this was the only door left on the car I opted for it to stay as such - a door.
The Wolf, Left, Unpainted.
The rear had the small laspistol added as a deterrence for any would be gangers sneaking up on Wolf from behind as well as a small camera to help the Wolf stay alert to anything coming in from the rear. In addition, two smokelaunchers were also added as a further deterrent against incoming attackers, and also for means of making a more stealthy getaway!
The Wolf, Rear, Unpainted.
Following this, I gave it a liberal undercoat of black - my undercoat of choice. And then I finally was able to go to town with the actual paint job itself.
Painting the Wolf -
Now, I cannot explain to you why I chose this particular colour scheme other than the fact that I kinda liked the colour and didn't wan't for all of the fast racing cars in the game to be painted red. The main colour of the car itself is GW's newish Foundation Color; Tau Sept Ochre. The Missile Turret was painted with Reapers Muddy Olive, Foundation Darksun Yellow and other parts were painted either Vallejo's London Grey or Dark Grey. So, the paint was sploshed on in a rough fashion. And the end result looked as thus:
More Views:
Front, left, right and rear.
Washing the Wolf -
And this was when the magic happened; heavy and liberal amounts of watered down inks (black and chestnut in this case) sploshed all over the vehicle. I must say that I'm not 100% pleased with the results, but it makes for a very gritty looking car to say the least. It was also the same technique I used to paint the weathering on the Old Crow vehicles posted yesterday.


And there you have it; The wolf is finally road worthy!
A Special Treat -
So, what can you - the reader - actually use this for? Well, as a special little treat for those interested here follows the stats for this very special Mercenary; complete with a price tag and all of the rules associated with this very special Mercenary.
The 'Lone' Wolf; Nomad Mercenary
Few people know of the exact origins of this mercenary. He simply arrived one day at Junktown, selling his services to the highest bidder. This wouldn't normally lift any eye-brows from the local populace except for the fact that 'Lone' Wolf arrived to Junktown in a souped up Fernando 8000, the last of it's kind - equipped with many high-tech devices long thought destroyed or dissapeared...
'Lone' Wolf
| AC | RA | CC | ST | T | W | CO | AR |
| 9 | 4 | 3 | 3 | 4 | 1 | 6 | - |
Skills: Pack Mule
Fernando 8000 (Normal Car)
| ACC | BRK | AR | PR | W | HA | MS |
| 4/4 | 4/5 | 8 | - | 5 | -1 | 25 |
Equipment:
- Fixed Forward Machinegun, 120 caps
- Fixed Forward Railgun, 230 caps
-- Targeting Computer, 600 caps (RA: 3, space +1)
- Turret Missile Launcer, 100 caps (+3 space, +200 caps)
-- Targeting Computer, 400 caps (RA: 2, space +1)
-- Frag Missiles, 65 caps
- Rear Laser Rifle, 100 caps (+1 space, +50 caps)
- Rear Grenade Launchers, 70 caps (+1 Space, +50caps)
-- Smoke Grenades, 10 caps
- Heavy Suspension, 120 caps (+1 RA when firing vehicle mounted weapons)
Price Tag: 1905 Recruitment, 953 upkeep.
That's it for now! Stay tuned for more Post Apocalyptic Madness as the Power Armor makes it's appearence in Road Warriors!
Happy Gaming!
Torben
2 comments:
WHOA... I'm loving this project!
What mini is the guy standing next to the car?
HaHaHa
Yeah Quarrantine was a good game, not sure if its worth making a model completely based on it though!
Post a Comment